Reviewing and editing results
Before you extract, preview the sections and fine-tune them with AI clip refine; then turn the extracted clips into short-form videos to download or upload to YouTube.
Reviewing highlights
Section preview
Play the selected scene to check that it is a section you can actually use.
Reason for selection
Refer to why the AI recommended that section as a key scene.
Content goal
Make the final call on whether it suits your actual purpose: short-form, promotion, a summary.
Further editing and use
Refine an extracted clip in the short-form editing screen and render it, then download the finished short-form video or upload it straight to YouTube.
Open the editing screen with the Make shorts button.
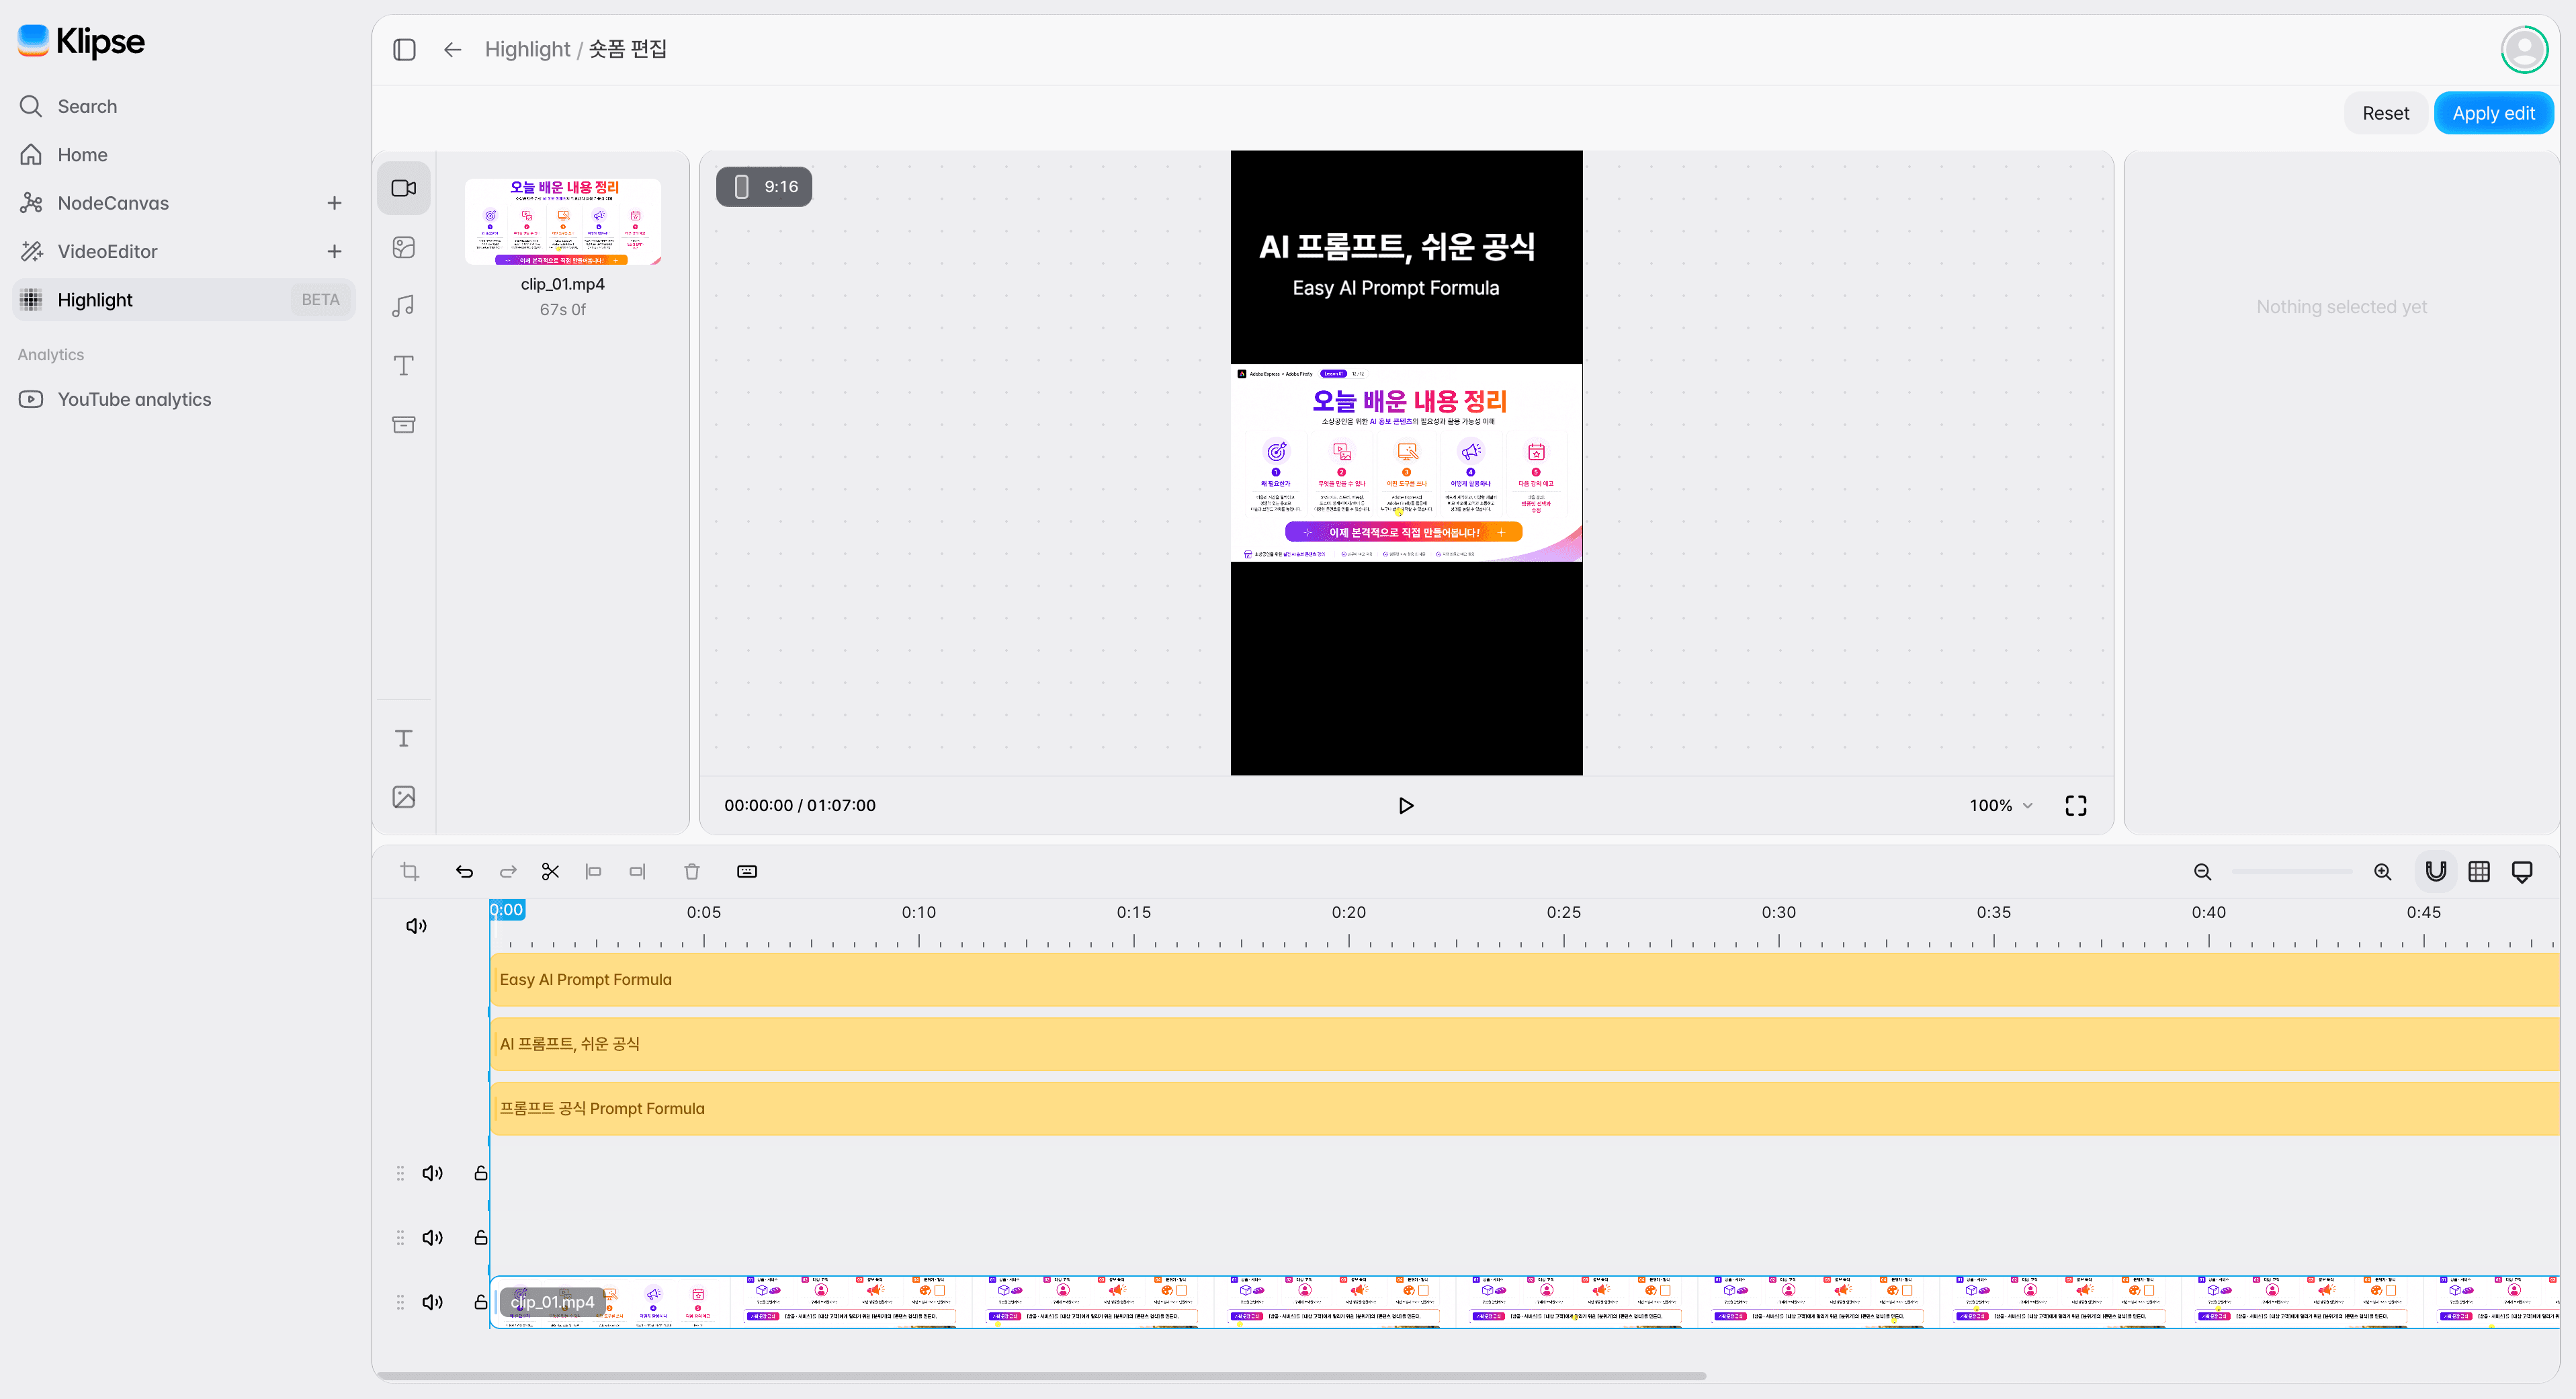
Pick a clip in the extracted clips list and press the Make shorts button under the preview. Once the captions are generated, the editing screen opens with the title and captions already added.
Refine the captions and range, then start rendering.
In the Templates tab, choose a caption template and layout, and adjust the captions and range on the timeline. When you finish editing, press the Start rendering button.
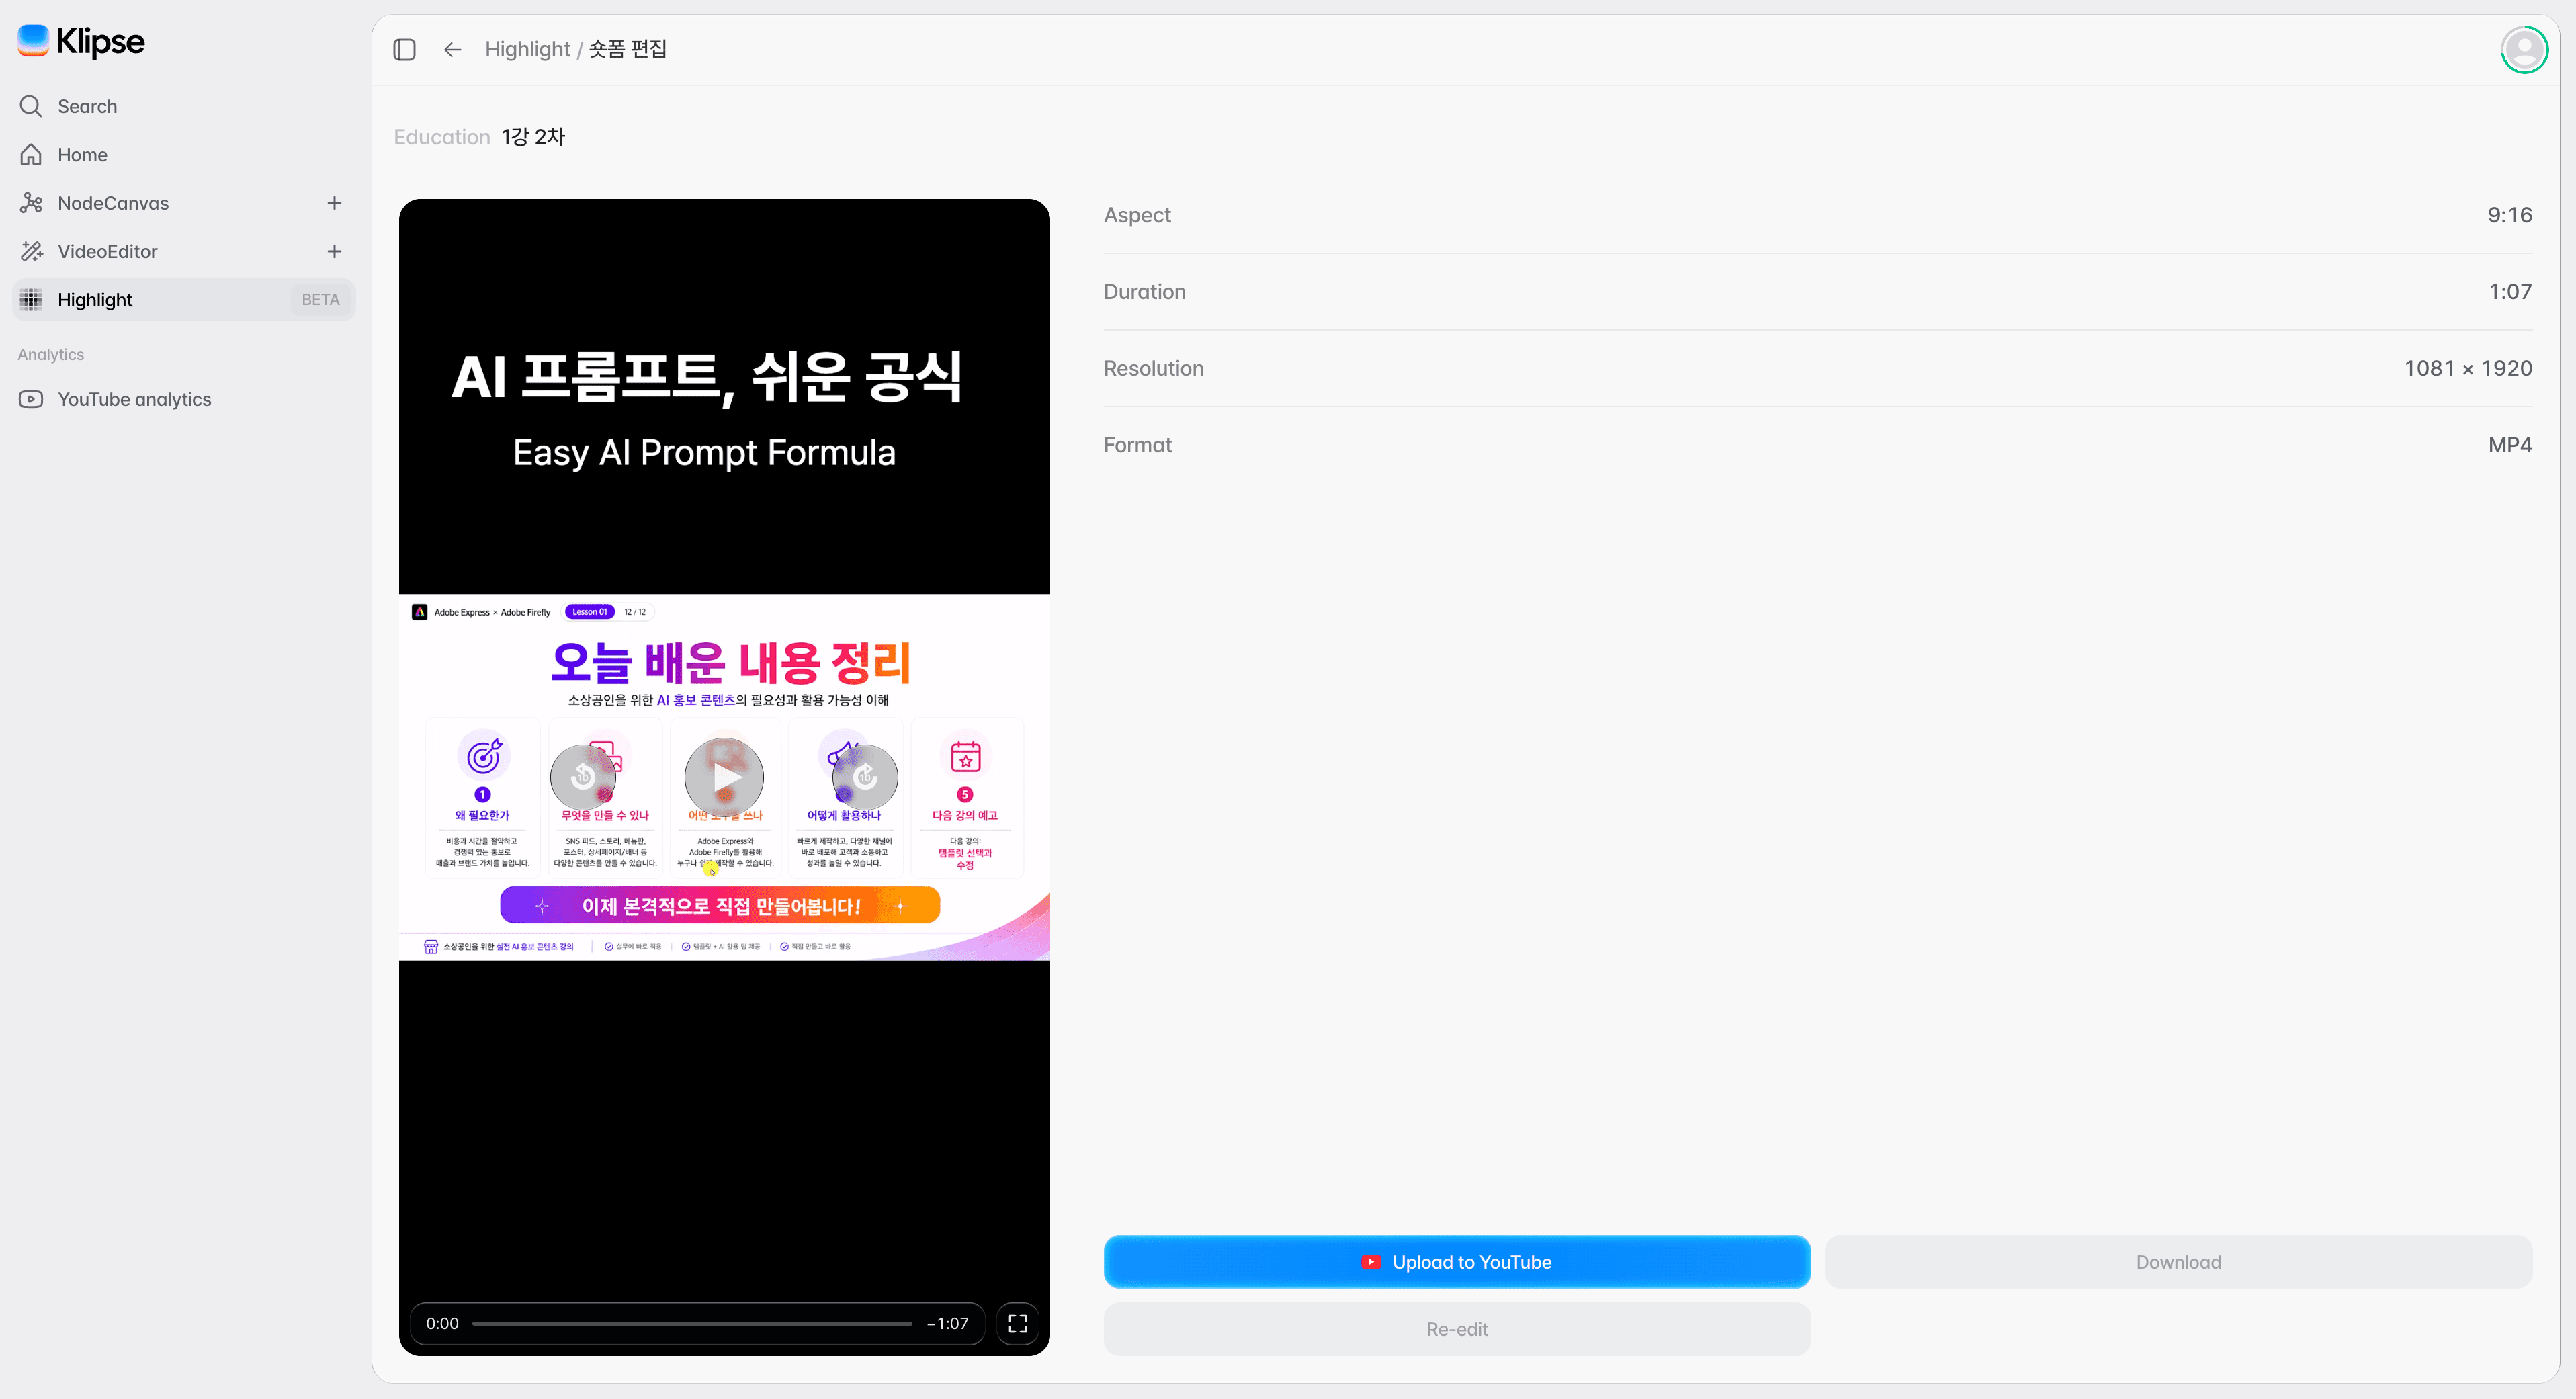
Check the finished short-form video.
When rendering finishes, the result screen opens, and you can save the video with the Download button. If something needs fixing, the Re-edit button takes you back to the editing screen.
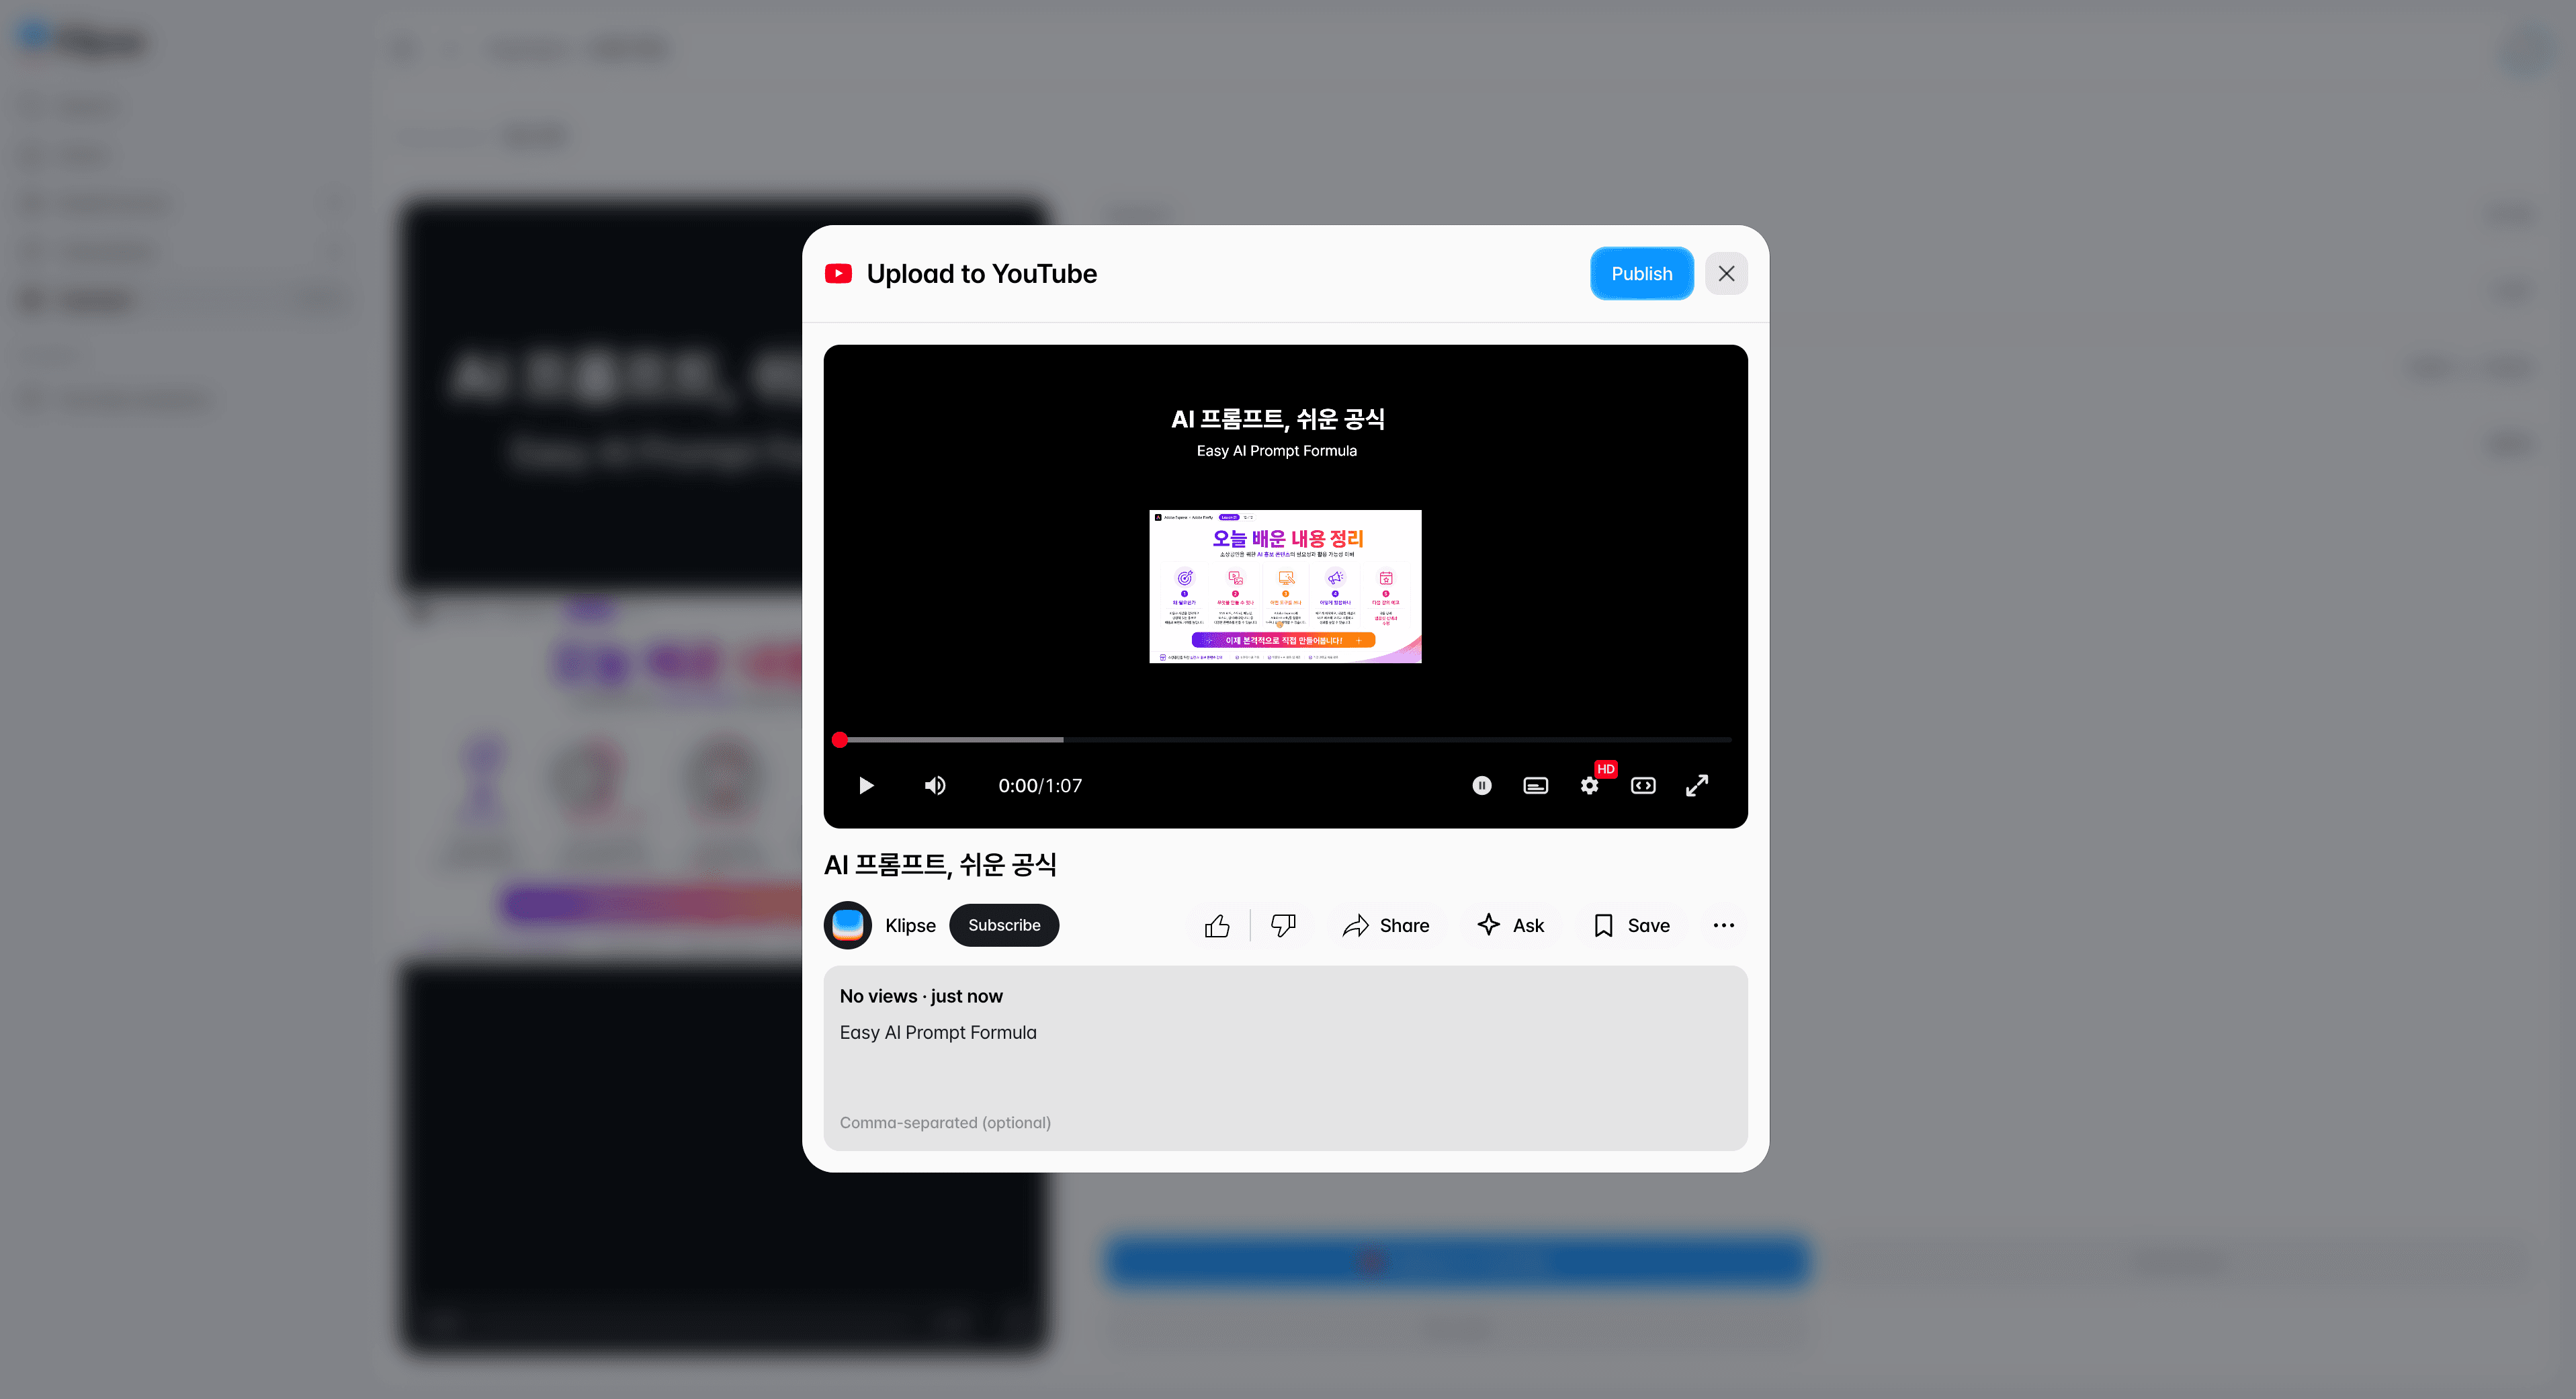
Publish it to YouTube.
Press the Upload button on the result screen to open the Upload to YouTube window, with the title of the short-form video already filled in. Add a description and tags if you need them, then press the Publish button.
Frequently asked questions
Do I have to use every highlight the AI picked?
No. The analysis results are candidates, so select only the sections that fit your actual content goal.
Can I see the reason each highlight was selected?
Yes. You can also see why the AI judged that section to be a key scene.