NodeCanvas overview
Node Canvas is the Klipse workspace where you place and connect prompt, image, video, TTS/sound, editing, and upload features as nodes, building the whole AI content production process into a single workflow.
What can you do in Node Canvas?
You can build the whole path from an idea to a generated result, and on to the next production step, on a single screen.
Screen layout
Understanding the structure of the screen and the role of a node first makes a workflow easier to build.
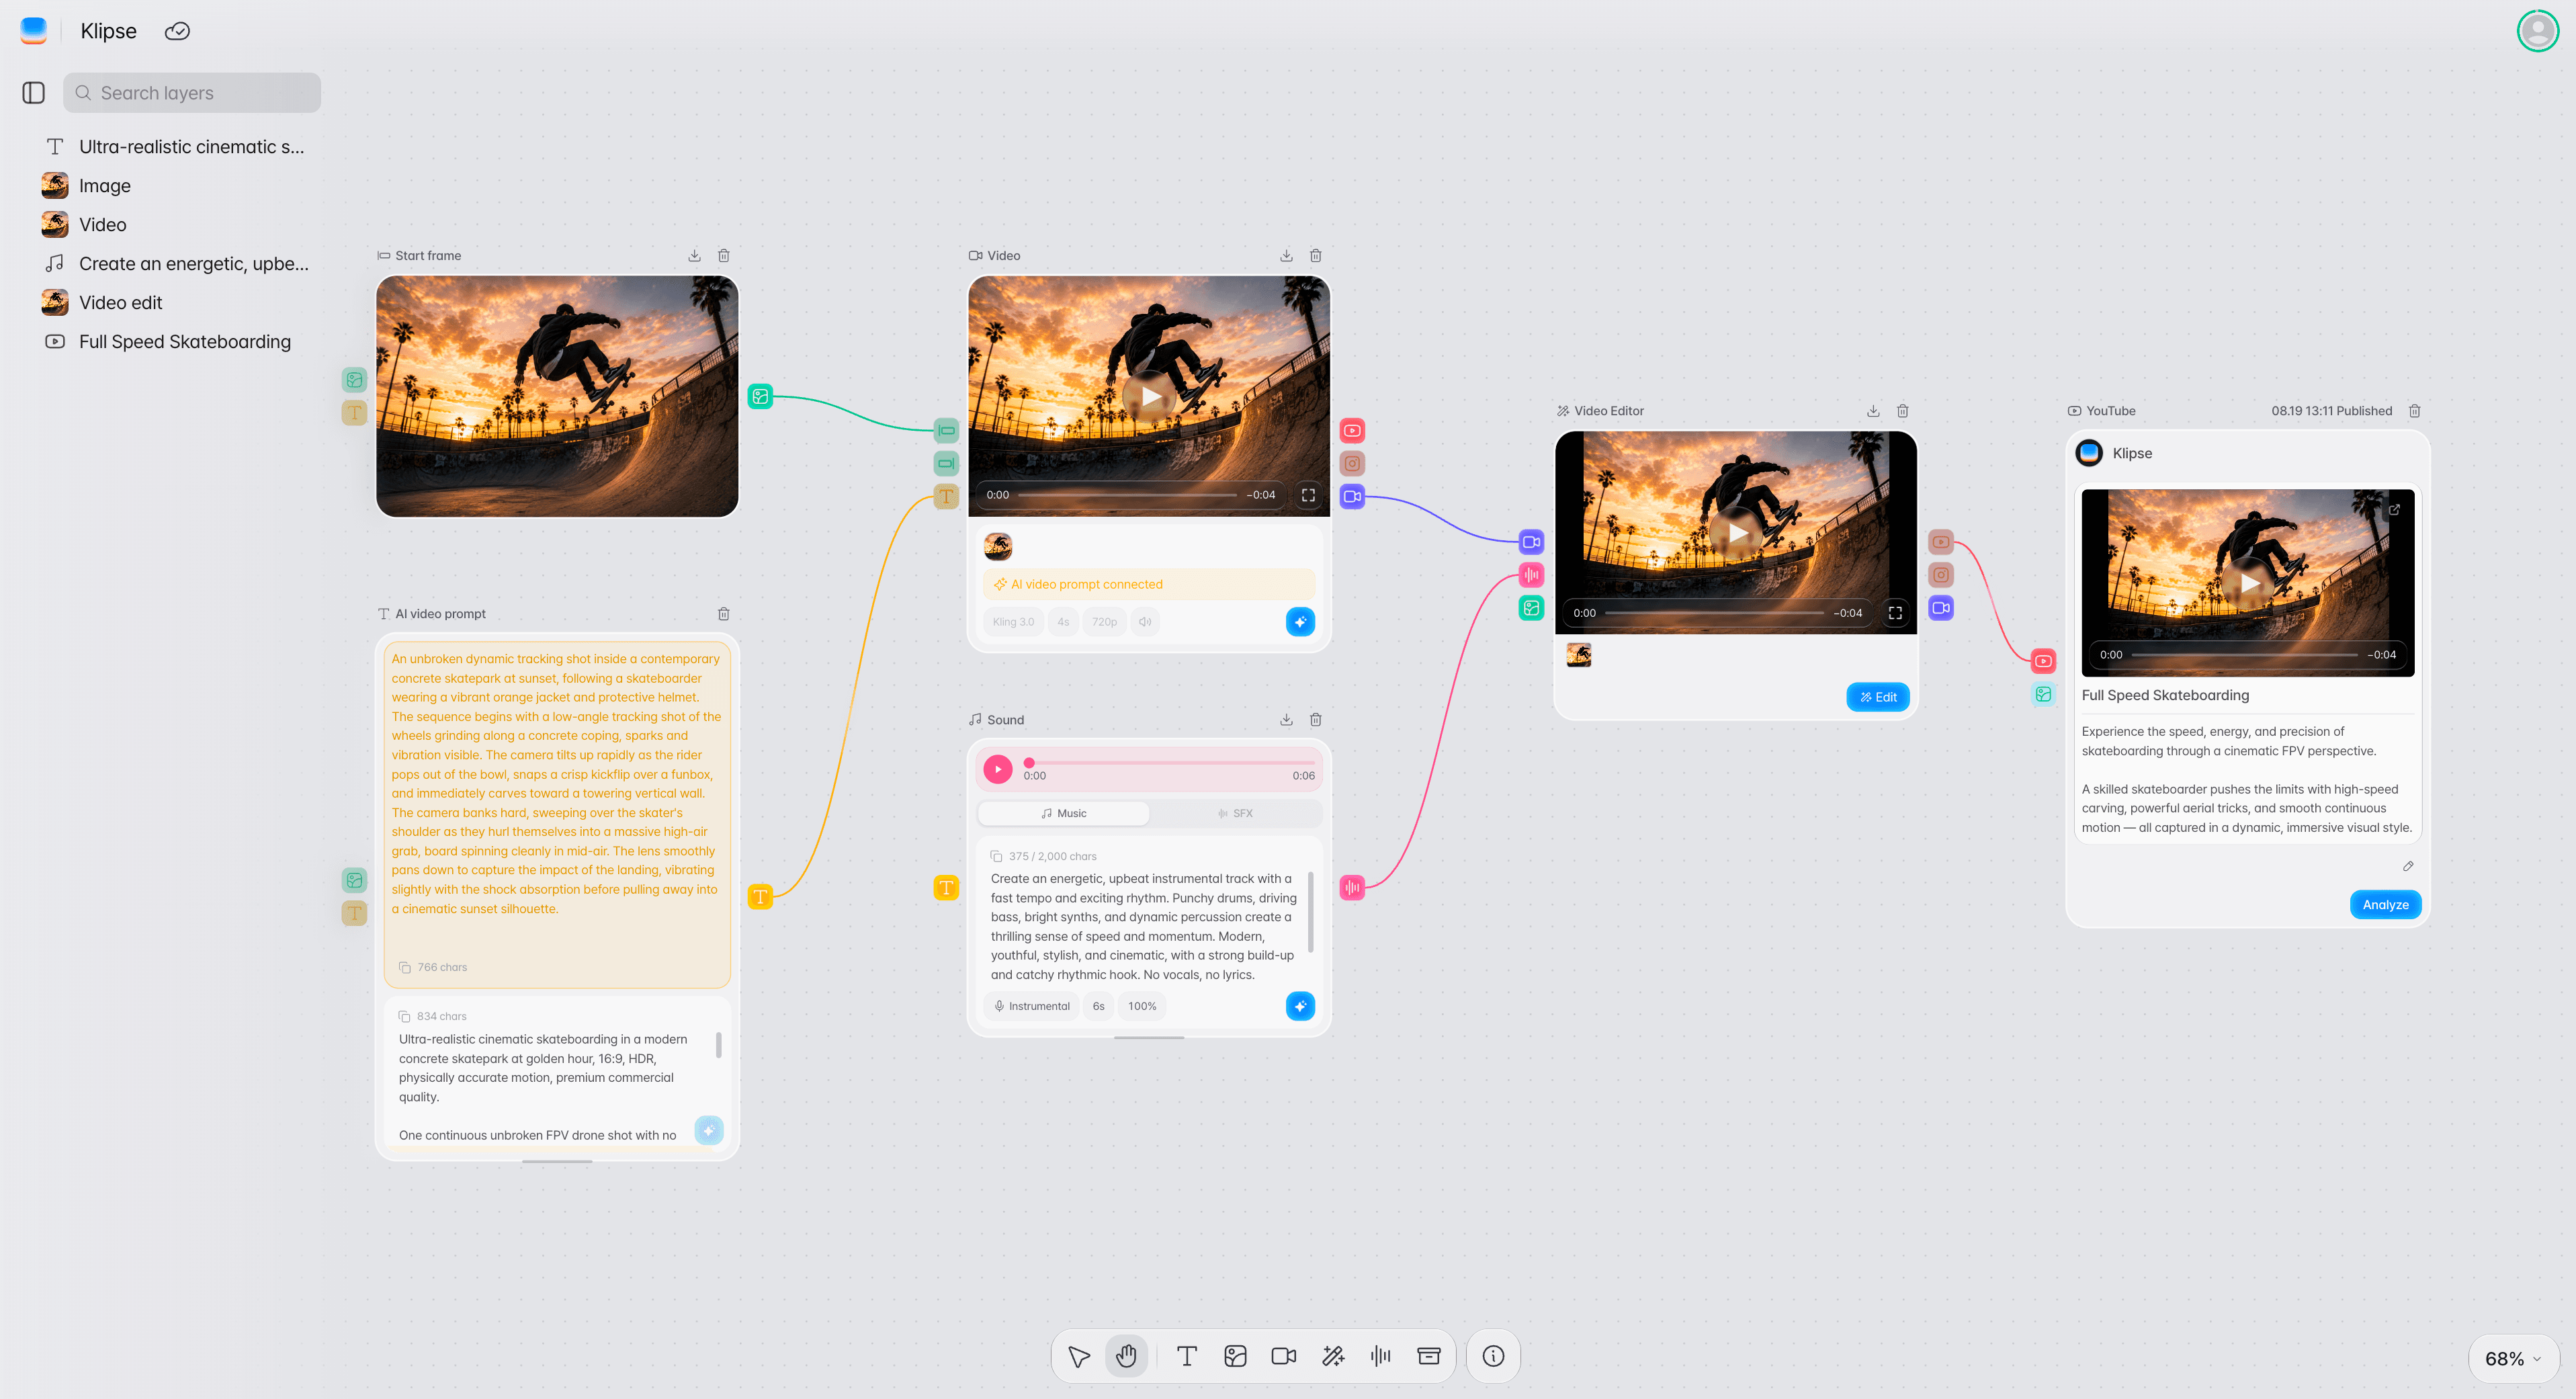
Canvas
The workspace where you place and connect nodes freely.Node
A functional unit that performs one task, such as writing a prompt, generating an image or video, generating audio, editing, or uploading.
Connection
Passes the result made in the previous node to the next node as its input.
Organizing a workflow with layers and sections
The layer panel shows every node placed on the Canvas at a glance, and a section groups related nodes into a unit you can collapse and expand. Even as a workflow grows complex, these two keep the whole production structure easy to read.
Layer panel
Shows the nodes on the Canvas by type name — text, image, video, voice, sound, video editing — and nodes that belong to a section appear under that section. You can search or rename them, so you can find the task you want right away even when there are many nodes.
Section
A unit that groups related nodes together. You can add a section from the toolbar and give it a name and a background color, and collapse or expand it so only the work you need right now stays open.
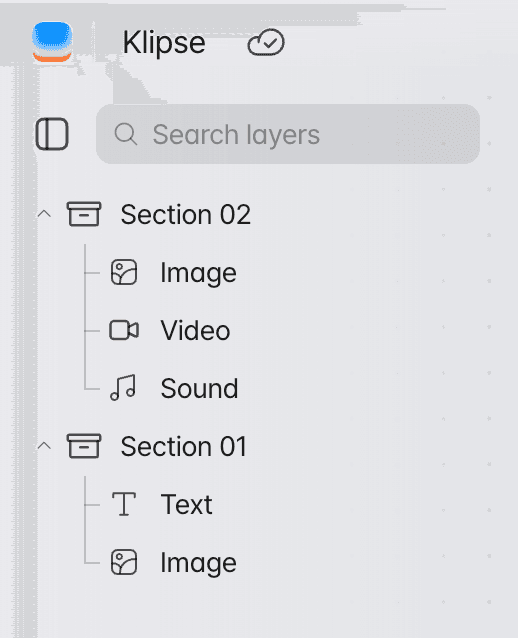
How layers and sections relate to nodes
The layer panel is a list for browsing nodes and a section is a unit for grouping them, while the actual AI generation, editing, and upload work happens in the node. For example, you write a prompt in a text node, an image in an image node, and a video in a video node.
AI prompt generation
Write the prompts to use for image and video generation.
Image generation
Generate images from a prompt or a reference image.
Video generation
Generate video clips based on prompts and images.
TTS / sound
Generate the audio a video needs, such as voice, background music, and sound effects.
Video Editor
Pass generated media to the editing screen to edit subtitles, audio, and clip composition.
Main nodes
This page introduces only what each node does. The detailed options and supported models for each node belong in the separate node guides and the AI Models documents.
AI prompt
Expands a simple request into a specific prompt you can use for image and video generation.
Image generation / upload
Generate an image from a prompt, or use an image you upload yourself as a reference image or as a start or end frame.
Video generation
Generates video clips based on prompts and images.
TTS / sound
Converts a script to voice and generates background music and sound effects.
Video Editor
Passes generated media to the Video Editor to edit subtitles, audio, and clip composition.
YouTube
Uploads the finished video to a connected YouTube channel and sets the title, description, schedule, and thumbnail.