Connect and run
Connecting nodes lets you use the text, image, video, or audio produced in an earlier step as the input for the next one. Once the connections are in place, you can run each node and carry the work through as a single production flow.
Connecting nodes
Drag from the output connection point of the earlier node to the input connection point of the next node to connect the two.
Select the output connection point.
Select the output point on the node holding the result you want to pass to the next task.
Drag to the input point of the next node.
Drag to a connection point whose input type is compatible.
Check the connection line.
Once the connection is made, the next node can use the result of the previous one.
Using a connected result
The point of connecting nodes is to carry a generated result straight through to the next step instead of entering it again.
Text → image
Pass the prompt made in an AI prompt node to an image node to generate an image.
Image → video
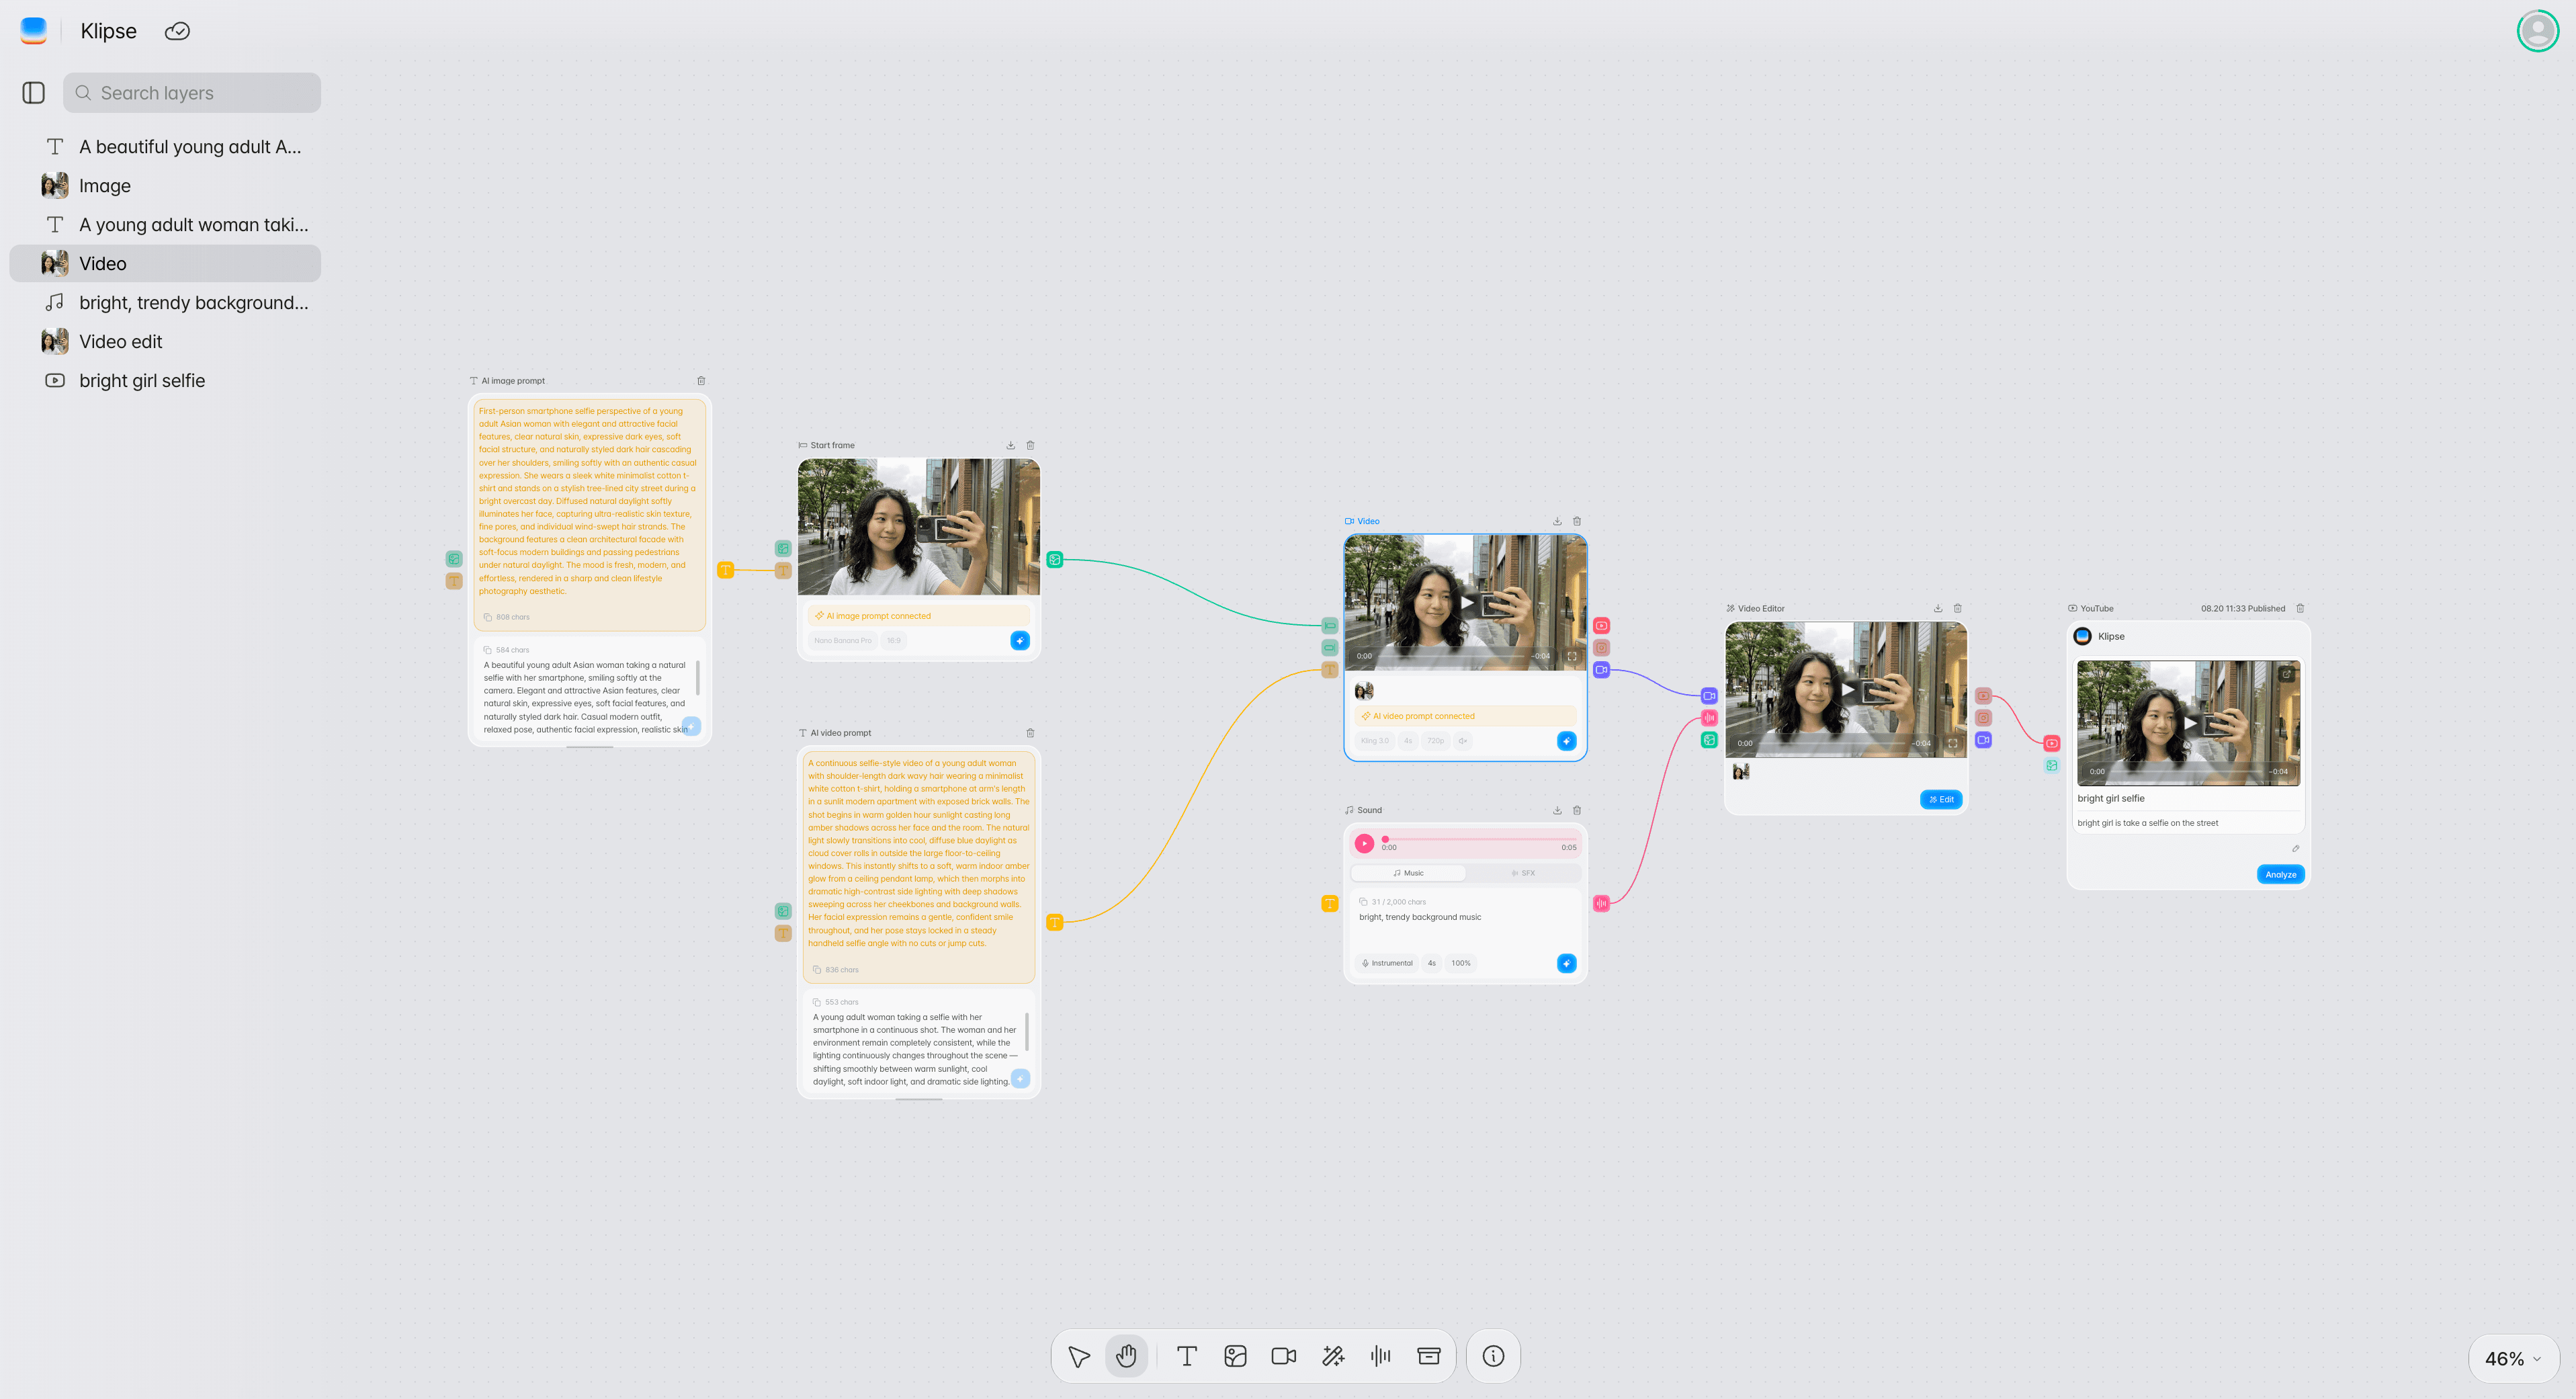
Connect an image you generated or uploaded to a video node to use it as the input image for the video.
Media → Video Editor
Connect generated media such as video and audio to a video editor node to pass it to the editing screen.
Image → YouTube thumbnail
Connect an image node to the image input of a YouTube upload node to set it as the thumbnail.
Running a node
Check the required settings and connections, then run the node and check the generated result.
Check the inputs and settings.
Check that the required values are ready — prompt, image, model, aspect ratio, length, and so on.
Run it.
Select the node's run function to start generating.
Check the result and pass it to the next step.
When generation finishes, check the result and regenerate it if needed, or use it in the next node.
Basic workflow examples
Start with a short connection at first, then add the editing and upload nodes step by step.
Making a video from an image
From production to upload
Troubleshooting
Check the items below when a node will not run or a result does not carry through.
| Problem | What to check |
|---|---|
| The nodes will not connect | Check that the input and output types you are connecting are compatible with each other. |
| The node will not run | Check that every required input and node setting has been entered. |
| The result does not appear in the next node | Check that generation in the previous node finished properly. |
| The video result is not what you expected | Check the prompt, input image, model, length, aspect ratio, and other settings again. |
Frequently asked questions
Can I use a result generated earlier in another node?
Yes. Connect compatible nodes and the result of the previous node becomes the input for the next task.
Can I upload an image myself and use it to generate video?
Yes. Upload an image to an image node, then connect it to a video node to use it as the input image.
Can I post a generated video straight to YouTube?
If you have a connected channel, you can set the title, description, schedule, and more in the YouTube upload node and upload it, and you can connect an image node as the thumbnail.